Steve & Renee selected two images of Ilia's frescoes from his portable fresco collection to serve as a reference / general idea of "feeling" and style for the future fresco. Also patrons and artist developed a general "wish list" for elements and details of the composition.
Two different composition concepts were developed and illustrated with two 24"X10" (1 inch=1 foot.) sketches. Next steps in the design/composition development will be discussed in the Cartoon section and now to the Preparation of the Wall!
Everything in life rests on its foundation and only as strong or successful as the base that it is rests upon. Fresco begins with the wall. It is essential to pay close attention to all aspects of wall preparation, there are no shortcuts and substitutes for the materials and techniques. Every layer of plaster must be prepared and laid to its own specifications. Each layer affects how the wall will absorb and retain moisture during the painting process. The strength of the wall is also important since it has to "hold" a great deal of plaster. The best support for fresco is red brick. Before applying plaster wall should be thoroughly inspected for cracks and, most important, for salts and dampness. Later two are the worst and to some extend, are the only enemies of true (buon) fresco. If salt spots are found than the wall itself is not suitable for fresco - regardless what you do this spats will remain and eventually destroy the plaster. In such case a new wall (panel) should be constructed and anchored to the original wall with about 1.5 inch space in-between.. If the wall has damp spots it is necessary to locate the source correct the problem in most cases same wall/panel should be constructed as in example with salt spots. Diego Rivera painted most of his frescoes using this panel system, because it also helps to keep an even moisture throughout the wall during the actual painting process. Fresco Technique section of this website discusses this topic in greater detail.
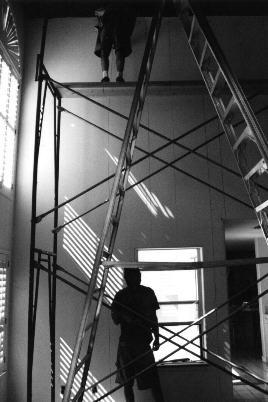
Such "wall/panel" system was used for the Albuquerque Fresco because the wall was originally painted with conventional paints, however it was not necessary to offset the plaster. Supporting steel beams were anchored to the original wall from the foundation to the ceiling to support the wall and plaster. Wire mash was fastened to the beams to hold five unique layers of fresco plaster.
Traditionally there is a total five coats of plaster used in fresco painting. Ingredients are as follows:
Sand - must be river sand, angular not round, scrupulously clean. See sand contains salts and land sand contains clay both are bad for lime plasters. It is also has to be well sifted to keep the grade even.
Slaked Lime - Lime Putty is a lime paste, best if slaked and let sit in the pit for a few years, but could be prepared from high quality hydrated lime by mixing into paste with distilled water. Lime should have no or insignificant magnesium content.
1. Scratch coat - is a base coat applied directly on the wall or wire mesh backed with a vapor barrier. Plaster is prepared with rather coarse grade of sand (in size slightly finer than sea salt crystals but coarser than laundry detergent), lime and Portland cement in a proportion of 3-2-10 or so. This coat is being floated flat, but rather rough and after it sets slightly scratched with tile trowel to give more of a "tooth" for the next coat, hence the name "Scratch Coat". (see photo on your right)
2. Rough or Brown coat - is prepared with finer sand (something like laundry detergent) and lime putty. As an option up to 20% of white Portland cement can be added. The proportion is 5-10 of lime and sand. This coat should be leveled up flat but left rough. Hence the name "Rough Coat". It could be also slightly scratched. (see photo on your right)
3. Float coat (Arriccio) - this is the last coat before the painting layer and should be floated with the wooden float to the absolutely flat surface but not troweled smooth. It is left "sand finished". I also like it slightly scratched with two nails driven through the wooden float, sticking about 1/8 of an inch into the plaster. It is made of 5 part of lime putty and 8 parts of finer (between sugar and laundry detergent) sand. (see photo on your below)
4 -- 5. Skin coat (Intonaco) - is a final painting coat made of extra fine sand and lime putty in the proportion of 5--8. Intonaco is applied in two separate steps Base and Skim. After the Base is laid and floated flat it is left to "sit" for about 20-30 min before the final, thin, 1/8 of an inch skin of plaster is applied. Skin must be troweled with a pressure to a very smooth surface. It should not be over troweled, because this will bring water to the surface and it will cause the layer to detach. After about 5-10 minutes this layer should be "pressed" with a trowel one last time. The wall is ready to paint in about 15 - 30 min after that.
To view text with photos click below
http://www.truefresco.com/albuquerque/preparation_albuq.html
to view only pictures (in separate window) click below
http://www.truefresco.com/albuquerque_show.html
-----------
Post your questions, suggestions and feedback here. It is essential on our quest to create the most complete and uptodate fresco painting tutorial.
Gramma/phraseological editing is encouraged, English is still my second language and hiring of a native English writer is in a dream stage at the moment (use my private message for that).
Next article "Cartoon" is to follow make sure you have subscribed to this forum or our newsletter ("Only Fresco")