FRESCO TECHNIQUE
OVERVIEW
Affresco ( In
English usage, fresco ). Painting done on freshly laid wet
plaster with pigments dissolved in lime water. As both dry they
become completely integrated. Known as true fresco, this
technique was most popular from the late thirteenth to the
mid-sixteenth centuries. The common assumption that all mural
painting is fresco painting is an erroneous idea. It is true that
one can in fact paint on fresh plaster, or intonaco, to make a
painting in affresco or a fresco. In true fresco the artist must
start applying his colors on the wet (or fresco) intonaco as soon
as it has been prepared and laid on the wall. The colors can thus
be absorbed by the wet plaster. When it dries and hardens, the
colors become one with plaster. Technically speaking the plaster
does not dry but rather a chemical reaction occurs in which
calcium carbonate is formed as a result of carbon dioxide from the
air combining with the calcium hydrate in the wet plaster.
 |
|
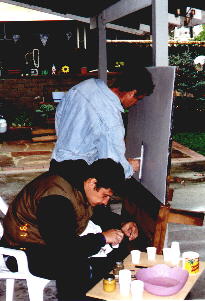
Early morning hours.While Ian Hardwick is applying the final "skim" coat - intonaco,
ILia Anossov is working on mixing right color tones for the day ahead.
This marks the beginning of painting day - giornata. Painting is
the final and most challenging, of course, stage in creation of the
fresco. Before the artist ready to pain several steps should be followed:
1). Full scale detailed compositional rendering - cartoon
should be developed and pounced tracing made.
2) Color study should
be created, it will be used for mixing right color tones and general color
reference. 3) Plaster has to be prepared a few days in advance (the
earlier the better - lime needs time to "adopt itself to the sand and gain
plasticity) in proportion of 8 parts extra fine sand to 5 parts slaked
(pitted) lime or so with the least water possible.
4) Panel
mast have three coats (scratch, brown/rough and float (arriccio),
coat names reflect the grade of sand - coarse, rough, fine ) of
plaster put on previously with intervals of 5 days in between the coats or
"wet on wet".
5). It helps to grind the base pigments with water
into the paste in advance storing them in sealed glass jars, this way in
the morning (before the painting begins) will be more time to prepare tone
mixes. Try about 25 different tones. Use freshly ground dry lime mixed
with water as white (pigments mixed with lime and lime mixed for whites
can not be saved) all mixes should be done ONLY with distilled water.
6) I use soft long bristle brushes of various sizes round and flat.
7) After the final intonaco is applied it should be left for about
20min to settle. |
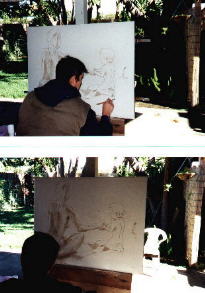
Late MorningILia Anossov is working on monochrome under painting.
After preparation is done and freshly laid intonaco had settled it is time
to transfer the cartoon. Tracing from the cartoon pounced along the lines
with needle or pouncing wheel is laid over the plaster and dusted over
with charcoal or simply incised (pressed along the lines) by the opposite
end of a thin brush to provide the base guideline for the painting
process. The under-painting is done with terra verde (green earth
pigment) with shadows enhanced in umber (picture on the
right) or with other colors, but remember in fresco it is not possible to
completely paint out a "wrong" color therefore every tone should be
carefully planned. Another thing to remember is that plaster behaves
differently during the day - it will need more water in the tones at the
beginning and the end of the day then in the middle and do not keep to
much paint on the brush - it will result in "blobs" squeeze it slightly
between the fingers before touching the plaster. |
|
 |
 |
|
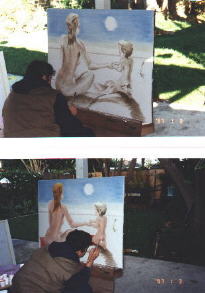
MiddayUnder-painting is done and Ilia Anossov is beginning
to apply color.
Major color values should be
painted out first in the same manner as under-painting - work the entire
giornata gradually and keep it balanced, also plaster will not take to
much paint at once, let it "rest" between the passes of a brush by working
on different area. It should be about 25 tone variations with light and
dark with two mid tones in-between of each color. The best working
pigments in fresco are the earth oxides and other mineral pigments. Some
pigments will not work with lime plaster at all - some man made greens
change to yellow as being mixed, so as many other modern day pigments
except the ones that specially formulated for the use with plasters. Test
the colors in advance by mixing little portions of them with lime, also
most of art supply stores should have reference material on traditional
fresco palette. |
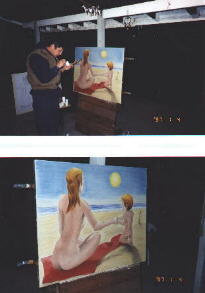
The End of the day.
ILia
Anossov is finishing the fresco. He is putting the last touches by picking
up the details and accents.
The end of the day for the
fresco painter is the most pleasant stage the plaster enters what is
sometimes called "the golden hour" - painting is 3/4 done and plaster is
in it's best stage. Time to finish the detail pickup and blend color tones
by passing over and over with lairs of transparent color at (this stage
the color mixes should be "wet" again). Painter must work fast and precise
at this stage because "golden hour" also means that plaster will soon
"lock up" - stop receiving paint (the paint will change to much lighter
opaque tone as soon a it touches the plaster - that is it put the brush
down!). One thing to remember is that in the next seven or so days
following the painting the fresco will be undergoing the curing stage and
this is a confidence test for the Artist. Colors dry at different speed
and plaster is naturally compacted unevenly although it looks flat and
perfect changes to white faster in more compacted ereas. These are to of
many other factors that make color in fresco change into discouraging
cacophony for the first few days after the painting is finished. But do
not worry in about 7-10 days it will look even more beautiful and just a
little lighter then the day it was painted.
. |
|
 |
|
 Printer-friendly copy
 Email this topic to a friend


